Wednesday, May 30, 2012

Recipe: Flan elote (corn flan)

I tried this dish first in Mexico city - it's a favorite of my brother-in-law.  Since we had lucked upon some delicious corn, I thought I should make some.  It is normally served as a dessert, but it isn't overly sweet, so it could go along with some teacakes, be had as a snack, or even find it's way onto a savory course dish.  It can be picked up, yet it is moist and creamy - if you look closely, you can even see a thin layer of custard at the bottom as the mix settles during cooking.  It has baking powder in it and the mixing process incorporates air into the batter, so for many of you it is a departure from "traditional" flans, but it is well worth a try.  

You will need:

5 - 6                             cobs of corn (I used 6)
300ml (1 10oz can)     sweetened condensed milk
90g / 3oz                     butter (plus more for the pan)
250ml / 1C                  milk
5                                  eggs
15ml / 1Tbs                 baking powder

Method:

 - butter the bottom and sides of a good size pan (9" x 14")
 - set the oven to 325F / 163C
 - put the eggs in a mixer and whip to a  pale foam
 - strip the kernels of corn from the cobs
 - puree the corn with the milk and condensed milk in a blender
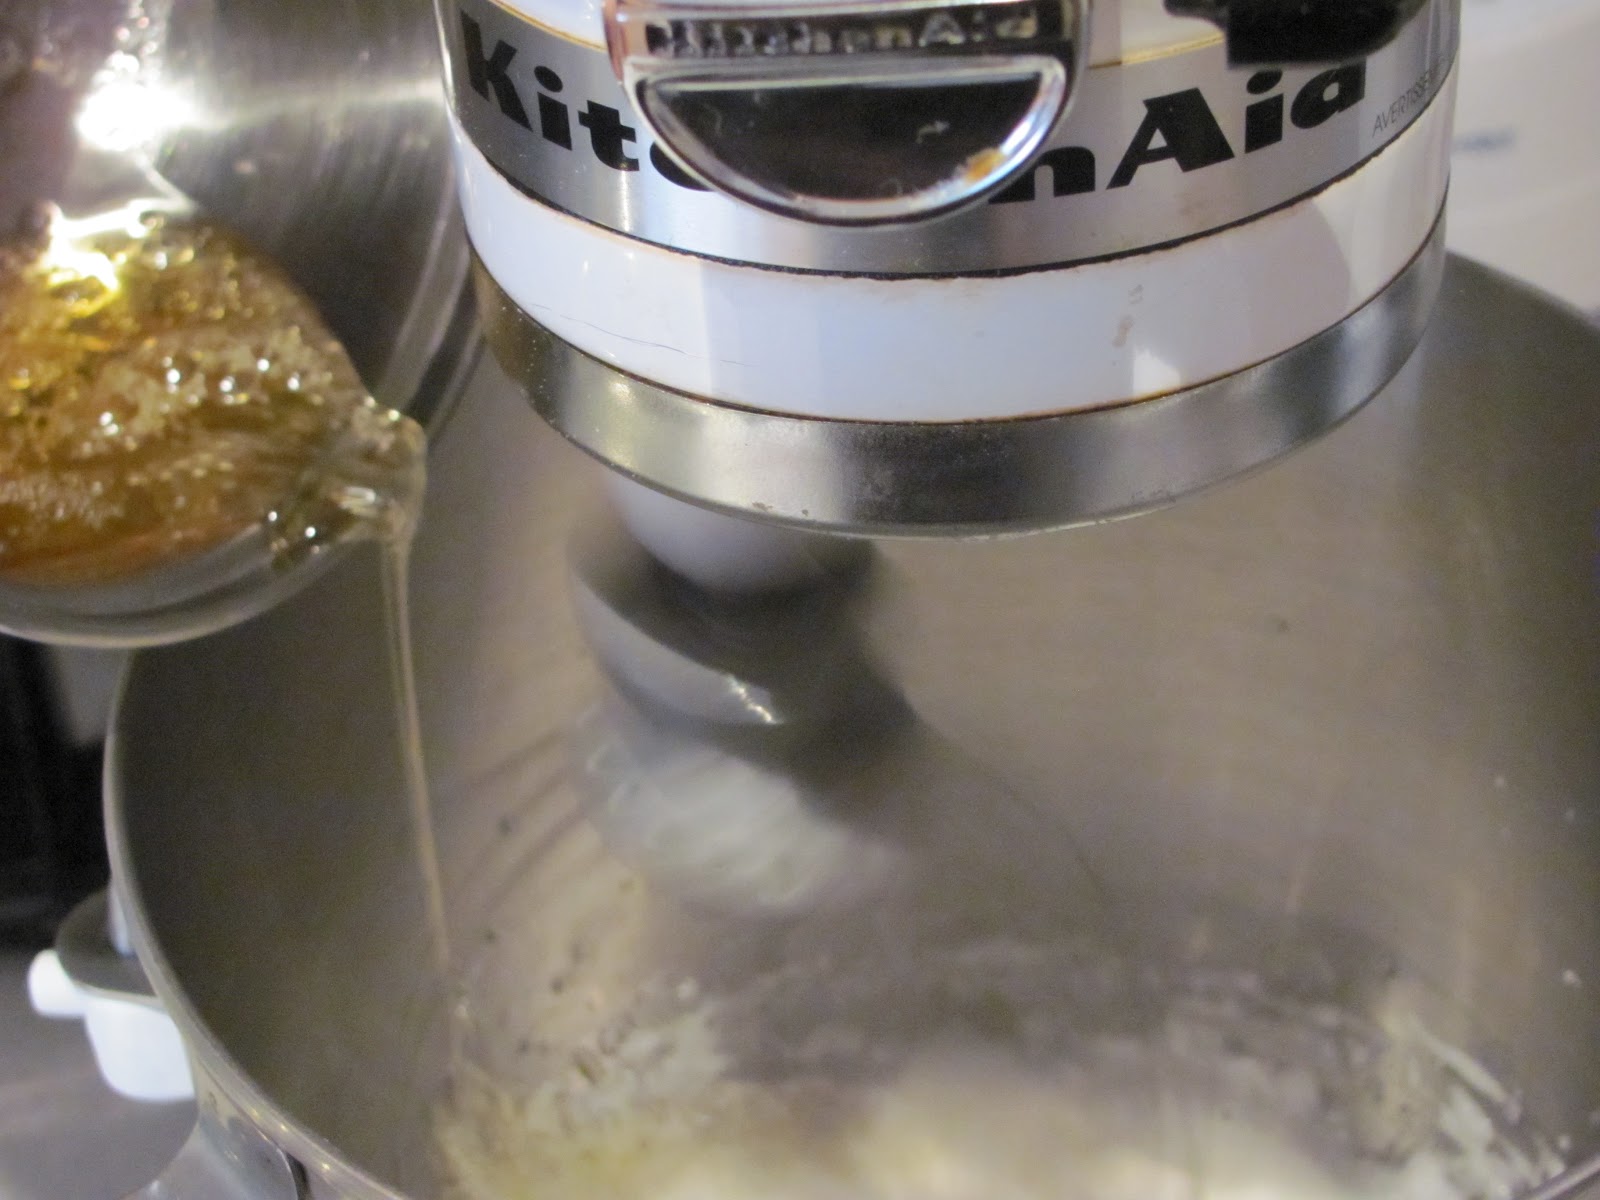
 - melt the butter and add to the blender while running 
 - add the baking powder to the running blender
 - drizzle the corn mix into the eggs with the mixer running
 - pour into the pan and place on the middle rack in the oven for about 45 minutes
 - test the middle with a skewer to come out clean
 - turn up the oven to 350F / 177C for another 5 minutes (for colour)
 - remove from oven and cool on a rack
 - if you want to turn it out, let it cool significantly, run a knife around the edge, place your platter over the pan and quickly invert 
 - serve


Monday, May 28, 2012

Recipe: Sous-vide polenta

I have thought about cooking polenta sous-vide for a long time, but only recently got around to experimenting with it.  To cook polenta properly the traditional method is a lot of work, and the potential for burning it if you don't scrape the bottom well (or turn your back on it for a second) is high.  I used polenta as a starch in a contest once and blistered my blisters during my daily practices - without a better option, such is the nature of the beast - you suck it up and keep going.  If you are in a hurry, make it the stove top method, it is faster, but if you've planned ahead, your life just got a whole lot easier.  You can have the polenta simmering on the stove in a holding pattern until the very moment you need it.

My goal was to produce a super creamy polenta, and I got it.  To that end, I did soak the cornmeal overnight in a portion of the water but I'm not convinced it was 100% necessary, but it couldn't have hurt.  I also stuck to the most basic formula to focus on the cornmeal - you will probably want to involve some cheese at least, and maybe some onion, garlic, aromatics or what have you.  Obviously, any sweating of onion or garlic will have to be done outside the bag, and it's your choice to mix it with the cornmeal before or after cooking - before will infuse the flavours better, but garnishes will retain their character better mixed in after cooking.  Other good news, you don't need a water bath.  I threw my batch in the industrial steamer at work, but you could also put it in boiling water.  The ratio below will give you a nice soft product with some room for adding butter or cream if you like, but if you were planning to set the polenta for frying later, you would want to cut the water down.

You will need:

250ml / 1C             cornmeal
1L / 4C                   water
2.5ml / 1/2tsp         salt (this leaves room for a salty cheese)

Method:

 - heat up 500ml (2C) of the water and pour it over the cornmeal - mix it up and let it soak overnight in the fridge (optional step)
 - mix in the rest of the water, salt, and anything else going into the cooking process
 - seal it all in a bag - not too tight - leave room to expand without excessive air 
 - steam 2 hours, if boiling, a bit longer (steam is hotter)
 - once cooked, remove from the bag, mix in garnishes and serve - or set in a pan for cutting and frying later

Sunday, May 27, 2012

Recipe: Foie gras icewine ice cream

The idea of foie gras ice cream seems to either freak people out or get them really excited.  An emotional response to food is good, but when entering the realm of "weird", you definitely want to help people along with the acceptance or you'll lose them.  One chef told me once with reference to using molecular gastronomy that you need to base most people in the familiar before you start throwing the crazy stuff at them.  With reference to this ice cream, I would recommend using it as a midway amuse bouche between courses - it might be a bit much to serve as your dessert itself.  I love to garnish it with crushed up crispy fried duck skin and a drizzle of aged balsamic vinegar.  The key as well is the taste.  Think about your guests and their adventurousness.  A more timid guest will probably need a bit of a sweeter ice cream to help conceptually relate the dish with "ice cream".  Taste the mixture and don't temper the eggs until it tastes good - the double boiler will cook the liver, so you'll be safe.  An option a step further is to sear the foie, adding a delicious caramelization.  As lobes of foie tend to vary in size, be flexible with the recipe - as long as the flavour is there, the ice cream machine will freeze it.  Have fun with it!

You will need:

1                          lobe foie (450 - 500 grams / 1lb more or less)
125ml / 1/2C       icewine
125ml / 1/2C       glucose 
250ml / 1C          cream
250ml / 1C          homo milk
4                          egg yolks
to taste                 kosher salt
as needed            milk to soak the foie

Method:

 - bring the foie up to room temperature (keep it sealed in the package)
 - open the package and gently open the lobe up along the natural seams - remove any obvious veins
 - put the foie in a container and cover with milk
 - press saran wrap down onto the milk and soak in the fridge overnight
 - start water simmering for a double boiler
 - heat the milk, cream and glucose togetherto a simmer
 - temper into the egg yolks
 - return the mix to the heat and cook to 83C / 181.4F
 - chill over an ice bath to stop the cooking, then let sit warm on the counter out of the bath
 - bring the container out, take the foie out of the milk and discard the milk
 - pat the foie dry and roughly cut into pieces
 - pass the pieces through a tamis to remove any veins and transfer the liver to a bowl for the double boiler
 - place the bowl on the double boiler and slowly stir as the foie begins to melt
 - once the foie is more or less liquified, start stirring with a whisk - you want the foie to cook, but don't burn it
 - whisk in the icewine
 - whisk in the cream mixture
 - season with salt and check the taste - if you want it sweeter, now is the time
 - strain the mix through a fine mesh sieve into a bowl in an ice bath and keep whisking it gently as it cools to keep it emulsified
 - once the mix is stable, you can store it in the fridge to cool completely (overnight)
 - churn in an ice cream maker
 - store in the freezer

Friday, May 25, 2012

Recipe: Red pepper espuma (foam)

Espumas (or foams) are a great way to add a different visual effect to a plate along with an innovative texture on the palate.  For those unfamiliar with espumas, the simplest comparison is that you are putting a flavoured foam similar to a whipped cream on a dish as a garnish.  Some espumas will have some milk or cream in them for body, but to maximize the effect, many use a highly flavoured base lightly set with gelatin to mimic the body that is provided by the fat content in whipping cream.  The most common way to aerate the mixture to a whipped cream consistency is to use a pressurized whip cream canister and Nitrous Oxide cartridges.  With respect to this recipe, if you like you can roast the peppers before pureeing as different flavour option.  It is also very important to strain the mixture through a fine mesh sieve to ensure the canister doesn't clog.

You will need:

8 - 10            red bell peppers
5ml / 1tsp     honey
to taste          kosher salt
2 - 3              sheets gelatin (depending how firm you want the foam)
2 - 3              NO2 charges (depending how light you want the foam)
1                   whip cream canister (ISI is the most common brand)

Method:

 - seed and devein the peppers
 - you will need 500ml (2C) of puree, so puree the peppers one at a time in a blender until you see you have enough
 - let the blender puree really well, add the honey and season with salt
 - rehydrate the gelatin
 - pass the puree through a sieve and measure out the 500ml (2C)
 - heat 3/4 the mixture and melt the gelatin into it
 - mix the rest of the mix in and let cool
 - load the canister and charge with the NO2 - shake well with each charge
 - chill down completely and store in the fridge a few hours before use
 - shake well before dispensing

Thursday, May 24, 2012

Recipe: Corn soup with bacon and rajas (poblanos)

We came across some nice corn the other day and thought it was a nice day for a soup.  As nice as it is on its own, we also thought it would be perfect to get some poblanos involved, and a bit of bacon to round it out.  One nice thing about corn soup is the fact that you have natural cornstarch in play, so if you want to lighten it up, you can substitute milk for some or all of the cream and it won't turn out watery.  It definitely makes a difference to use butter in the cooking to get that corn on the cob satisfaction in the flavour.  We also left a portion of the soup un-pureed as we like a few kernels floating around, but puree it all if you like.  Removing the skins from the poblanos is best done over the open flame of a gas stove, but oven roasting will also work - this is an extra step in refinement, and if you choose to keep the skins and pan roast, the flavour is the same as long as you get the colour.

For the soup you will need:

Pan roast the corn
4 - 5              fresh corn cobs
1                   small onion
3                   garlic
500ml / 2C   cream
500ml / 2C   milk
as needed     butter
to taste         salt

To garnish:

3 - 4             strips bacon 

For the rajas:
Add cream and puree

3                  poblano peppers
1                  small onion
as needed    fat from the bacon
to taste        salt
to taste        black pepper

Method:

 - dice the onion for the soup
 - chop the garlic
 - strip the kernels of corn from the cobs
 - in a pan on medium heat, sweat the onion, garlic and corn in the butter
 - gradually turn up the heat to slightly pan roast the corn
Saute poblanos in bacon fat
 - add the milk and cream and bring up to a simmer
 - transfer to a blender and puree smooth (keep some corn aside if you like the kernels)
 - strain through a mesh sieve back into the pan and bring back to a simmer
 - adjust the seasoning and it's ready to go - keep warm while making the garnish

For the rajas:

 - cut the bacon into lardons (short crosswise strips)
 - cook the lardons in a heavy pan (cast iron is best)
 - drain the fat and keep the bacon aside
 - char the poblanos and remove the skins (if you choose)
Get some colour
 - remove the seeds and veins from the poblanos and slice a thick julienne
 - julienne the onion
 - with the cast iron pan on medium heat, add back some bacon fat and saute the onion and poblanos
 - keep cooking until the poblanos soften and get a good dark green colour
 - season to taste with salt and pepper
 - use to top off the soup along with some of the cooked lardons


Tuesday, May 22, 2012

Maple syrup

Let 'er rip!
I  recently mentioned how the maple lemonade cleanse turned me onto low grade maple syrup as my syrup of choice - here's why.

First off, the flavour is far superior.  Maple syrup grades "B" or "C" (#2 or #3) are less refined than grade "A" (#1).  You simply get the purer flavour of the sap.  In Vancouver you see all the tourist shops with their maple leaf shaped bottles of syrup proudly advertising "Grade A" - it's sad.  Feeding all these folks a watered down product at a premium price.  The "A" syrup is so filtered, the colour is almost gone, along with all that flavour.  My lucky brother out in horse country in Ontario actually gets to go out to the Mennonite farms and pick up bottles of #4 - I can only imagine.  Maybe this year he can send me a bottle for Christmas (hint, hint).

Second, believe it or not, by getting less refined maple syrup, you get a nutritional boost.  You still don't want to be sucking the stuff down by the pint, but if you are topping off your pancakes, why not get the odd nutrient along with it?  The less refined your maple syrup, the more you get to benefit from:

Take the one on the right
potassium
calcium
magnesium
manganese
phosphorus
iron
zinc
copper
tin
sodium
pantothenic acid (vitamin B5)
niacin
biboflavin (vitamin B2)
malic acid
citric acid
succinic
fumeric
amino nitrogens
phenios

 - as well as several other elements in trace amounts.

Often, to get the lower grades of syrup, you need to resort to an organic company - whether you're big on that or not, it's another plus.  Some hardcore healthy people actually don't like to use honey (Honey and I get along fine) as it is technically a product digested by an animal, and therefore some of the goodness is already gone - it also makes honey vegan non-friendly.  Good old maple syrup comes straight from the tree, no monkey business, right into your belly. There's nothing not to like.

So there you have it, say goodbye to the "golden" crap and go maple, dark maple.  Put it on your pancakes, put it on your flag - we did.


Monday, May 21, 2012

Cookbook review: Dessert Cuisine

Chef Oriol Balaguer's Dessert Cuisine is a really great book.  If you've ever felt intimidated by the thought of attempting really high end pastry work, this book should help you get past that.  The dishes are intricate and beautiful, yet chef Balaguer breaks everything down into manageable elements.  I remember being surprised at how many recipes can be broken down to 3 or 4 ingredients, but if you looked at the photo first, you'd think there's no way you could tackle it.  It also makes it easy to pick and choose favorite elements from assorted dishes and create something of your own - take this sponge, top it off with that poached fruit, surround it with another dish's soup and pick one of a myriad of garnishes and your guests will be stunned.  Each element simple enough on its own, but with a bit of effort in the assembly, a winner in the finish.  I like this book so much that when we were in Spain last summer, I made it a personal mission to go to one of chef Balaguer's pastry shops - a tall task in August (vacation season), I went to the Madrid shop (closed), and all three Barcelona shops before I found the one that was holding down the fort  (then had to come back because of siesta) - but it was worth the effort.  This book is worth the effort too - CHECK IT OUT HERE.

Sunday, May 20, 2012

Recipe: Maple lemonade

This recipe comes from the Master Cleanse lemonade diet.  It's not my place to tell you to do it, but I've actually done it twice, which is extremely difficult to do when you cook for a living.  The cleanse changed my life in a very unexpected way - it's when I switched to "C" grade maple syrup (#3) and never turned back.  The lemonade portion of the diet is not only delicious, it's nutritious (for the duration of the diet, the lemonade provides you with all your essential vitamins).  I've made the lemonade off and on ever since just as a refreshing summer drink with the added benefit that it also serves as a multivitamin.  Your kids will never know what hit them.  

The recipe following is for one person's daily intake as per the diet, but if you aren't doing it, it's for a two litre jug of tasty lemonade.  Of course, if you are just making it as a summer drink, you may want to omit the cayenne and feel free to adjust the amounts to your taste - at least you aren't cooling off with store bought yellow sugar water.  As well, living in Vancouver, I proudly drink our Capilano fresh tap water - if your tap water is good, use it and save a plastic bottle.  Careful not to spill any of your Meyer Limoncello in there, that would be a downright shame.

You will need:

60oz / 1.77L                      bottled / filtered water (or mountain fresh)
12Tbs (6.09oz) / 180ml    grade "B" or "C" (#2 or #3) organic maple syrup
12Tbs (6.09oz) / 180ml    fresh squeezed organic lemon juice
1/2tsp / 2.5ml                    cayenne pepper

Method:

 - if you are cleansing, or just like it, microplane some of the lemon rind to add in as extra fibre
 - juice the lemons, remove the seeds, but keep the pulp
 - add the maple syrup, cayenne and water and mix well
 - keep it away from the limoncello
 - start sippin'

Saturday, May 19, 2012

Recipe: Duck confit - sous-vide and traditional

Ducks are maybe my favorite bird.  I love to watch them come in for a landing on a glassy lake, I like to eat them.  A perfectly cooked duck breast is a thing of beauty, but you really can't do much with it other than let it bask in its own beauty.  Duck legs however, open doors everywhere.  You can roast them of course, but I prefer to gently confit them.  Once done, you can serve them whole, roasting the outside to crisp up the skin, or you can pull the meat apart and use it as a filling for won-tons, spring rolls and tacos.  You can move up a level and make a beautiful terrine or delicious rillette.  Always save the skin for something devious - it's too good to waste.

Some chefs like to confit in olive oil - it's just fine, but if you have the duck fat, I'd recommend it.  If you store it well in the freezer, it actually gets better with each successive batch of confit as it absorbs more flavour.  You'll have to get a bit creative after the cooking, as you will accumulate a wonderful layer of duck jelly below the fat.  I usually remove the legs and aromatics and chill the fat right down in the fridge, then it's easy to dig through the fat to the jelly and gently remove it.

You will need:

4              duck legs
1              small onion
1              large shallot
4              cloves garlic
4              cloves
12            whole black peppercorns

1              cinnamon stick
1              star anise
1              orange zest (use a vegetable peeler, not a microplane)
1 sprig     rosemary
4 sprigs    thyme
to cover   duck fat (or enough to coat if sous-vide)

Method:

 - slice the onion, shallot and garlic and mix all the aromatics together
 - make a bed of most of the aromatic mixture in a container, lay the legs flesh side down, and cover the skin with the rest
 - marinate one day

Note:  If cooking sous-vide, set the water bath for 85C / 185F.  Lightly season the legs and place in the bag, disperse the aromatics around and scoop in a spoon or two of cold duck fat (or oil if you choose).  Make sure the fat is relatively spread around, but it will spread as it warms up.  Seal the bag and cook the legs for 6 hours.  If you know you will pull the meat apart, you can cook it longer.  Once cooked, cool the legs down in an ice bath completely.  Pick up the rest of the procedure from the point where the traditional method has cooled down.

 - select a good heavy pot for the confit
 - set your oven to 200F / 93C
 - spoon a bit of duck fat in the bottom
 - lay the aromatics down on the bottom (this is insurance against excessive direct heat)
 - lightly season the legs and lay on top of the aromatics evenly
 - spoon the rest of the duck fat over to cover - top up with oil if you need
 - slowly bring the heat up to barely a simmer
 - cover and transfer to the oven
 - cook for 4 hours, then check the legs - if the meat is just starting to stretch away from the end of the bone, move the pot to a rack on the counter
 - remove the cover and let the legs cool in the fat
 - let the legs rest in the fat in the fridge overnight
 - gently remove the legs from the fat
 - if serving as legs, roast skin side up at 350F / 177C till crispy
 - if pulling the meat apart, start pulling
 - warm up the fat till liquid again
 - strain off the aromatics and cool down in a container (glass will let you see the jelly)
 - when the fat is somewhat solid again, you can dig out the fat and get at the jelly
 - use the jelly as a binder in your pulled meat, or add it to the sauce for the roasted legs
 - save the fat and store it in the freezer for next time


Friday, May 18, 2012

Recipe: Peach honey soda

As we get into the summer season, sodas become a nice addition to a meal - especially when outdoors.  You can take sodas in two directions these days - the more traditional route where you are basically making your own soda pop, and the newer style where you play with the viscosity of the base and the outcome is something closer to a carbonated espuma, which can even in some cases is spooned onto the plate as another garnish.  Somewhere in between there is a nice point where the soda is dispensed out of the siphon a mass of rich foam that settles into a drinkable liquid in a minute or so.  All styles have their uses and there are several ways to work the viscosity to the level you want it.  A thicker base will hold the carbonation's "fizz" longer, but you may want to serve the soda with a spoon, which may increase the interest of the product or complicate things depending on your point of view.  

Going the natural route, you can thicken a base by starting with a puree rather than a juice and sweeten the soda with honey, maple syrup, or invert sugar.  More involved would be to use gelatin, xanthan gum, or another thickening agent.  Remember that however you go, the base needs to be able to pass through the siphon, so be careful not to go too thick, and always pass the base through a fine mesh sieve to make sure it's smooth.  Xanthan gum is easy - using a blender, just add a little at a time and monitor the thickness.  If you are using gelatin, I would recommend 1 sheet (or less) per 500ml, some chefs use 2 or more, but you are definitely using a spoon to eat it at that point.  

For this recipe, we'll keep it fairly simple and just use the puree and honey to thicken the base and you should get a soda that foams up well out of the siphon, then settles down a drinkable liquid.  If you want thinner, run the peaches through a juicer, then sweeten with honey.  If you want thicker, try one of the other ways, gelatin probably being the most accessible.  A standard soda siphon holds about a litre (quart), but I generally avoid filling it right up (I often use 2 charges for maximum carbonation, but it's not necessary). If you expect a lot of guests, you may want to source out another siphon or two since you get the best results if the mix is carbonated for a few hours, but in a pinch, as long as your base is kept very cold, you can refill, recharge and keep serving.

You will need:

1                      ripe peach (a good size)
15ml / 1Tbs     honey (or more if you like)
as needed        water
soda siphon
1 (or more)      CO2 charges

Method:

 - peel, pit and chop the peach up
 - set the chopped peach in a saucepan with a little water and cook till soft enough to puree
 - add the honey till you like the flavour balance
 - transfer to a blender and puree smooth
 - add water while running until your mix is about as thick as coffee cream (hopefully just shy of a litre)
 - if you were using gelatin, you would melt it in here
 - strain the mix through a fine strainer and chill completely
 -  fill the siphon with the soda and screw the cap on tight
 - load the CO2 into the siphon and shake well
 - refrigerate at least a few hours before serving
 - enjoy

Thursday, May 17, 2012

Recipe: Balsamic honey and preserved lemon vinaigrette

This is a visually striking dressing (it's jet black) and goes to show that you don't have to wait until you are making a Moroccan dinner to use some of those preserved lemons you made.  Between the balsamic reduction, honey and pureed lemons, it does a great job of staying emulsified, so it can double as a plate drizzle.  Use it over a nice plate of seasonal tomatoes and sliced buffalo mozzarella and you have a beautiful platter where the dressing won't just run past the food to the bottom of the plate.  I found with the lemons there was no need for additional salt.

You will need:

500ml / 2C                balsamic vinegar
90g / 3.2oz                preserved lemons (no seeds)
440ml /  15fl oz         olive oil
160ml / 5.4fl oz         honey

Method:

 - put the balsamic in a small saucepan and reduce to 250ml / 1C, then cool
 - rinse the lemons of excess salt under cold water
 - give the lemons a rough chop, then puree in a blender with a portion of the olive oil until smooth
 - with the blender running, add the honey, balsamic reduction, and the rest of the olive oil
 - check the seasoning, and it's ready to use

Wednesday, May 16, 2012

Recipe: Buttermilk biscuit cobbler topping

 The other day a friend came over with some apples to make a crumble.  We were about to make the crumble when I remembered I had just enough buttermilk around to make a cobbler topping, so we switched directions.  This recipe was a good size for a small glass dish, so if you have a large dish or like an extra thick crust on your cobbler you would want to double or triple it.  Grating the butter is a lot easier if the butter is frozen, otherwise this recipe is a snap and a nice finish to a simple dessert.  The deliciousness of what goes underneath is all you.
You will need:

50g / 1.8oz / 1/3C     flour
13g / 1Tbs                 sugar
7g  / 1/4oz                 baking powder
pinch                         salt
pinch                         grated nutmeg
pinch                         cinnamon
30g / 1.1oz                butter - grated frozen
60ml / 1/3C               buttermilk

Method:

 - freeze the butter if it's not already frozen
 - prepare the base of the cobbler and have it ready to cook
 - set the oven to 350F / 177C
 - grate the butter with a small cheese grater
 - measure out the flour, sugar and baking powder and salt and sift together
 - add in the nutmeg and cinnamon
 - toss the grated butter in the flour to mix
 - stir in the buttermilk until combined
 - spread the mixture over the top of the cobbler
 - bake immediately until golden brown on top (20-30 minutes depending on your oven)
 - serve


Tuesday, May 15, 2012

Recipe: Preserved lemons (shortcut method)

As a follow up to the recipe for preserved lemons, this method for preserving is not traditional, but if you don't want to wait a month for your lemons to be ready, it will produce a nice product in a couple days.  When I used it at work, we gave it three days to cure, but obviously more time will get you closer to the real thing.  Of course you can incorporate the traditional aromatics from the other recipe, but we kept it simple when we used it.  The inclusion of sugar in the recipe will add some sweetness to the end result - you may even prefer it and want to use sugar with a full cure.  Since the sugar will have an effect on the preservative quality of the recipe, best to keep it in the fridge during the curing as well.  As with the other recipe, rinse the excess salt and sugar off the lemons before using them.

You will need:

5            lemons
1/4C      kosher salt (or more)
1/4C      sugar (or more)

optional:  Sufi spice mix from other preserved lemon recipe
                fresh lemon juice

Method:

 - Wash the lemons well
 - slice the lemons into slices 1/4" / 1.5cm thick and take the seeds out
 - into a glass jar or quality plastic container, put down a layer of salt
 - start layering in the slices of lemons, alternating layers of sugar and salt between each layer and dispersing the aromatics in the process (if using them)
 - when all the lemons are in, make sure you have a tight fit in your container by gently pressing down
 - add any lemon juice you want to add
 - depending where you left off in the layering, add a last layer of sugar or salt to cover
 - store in the fridge to cure
 - if your container allows, flip it upside down each day for 3 days or more to ensure even curing
 - after 3 days you should be ready to use at will


Monday, May 14, 2012

Cookbook review: French Laundry

Thomas Keller's French Laundry cookbook has become an institutional standard.  At this point, he has several books, all quality, but French Laundry remains one of my favorites.  Its foundation in classic cuisine is absolutely solid with a focus on top quality ingredients, technique, refinement and polished presentation.  When you are producing consistent base product, it is easy to keep it classic or modernize it as your style leads you, but without that foundation, your food will fall apart.  I would recommend this book to any culinary student as it will take you that next step past where your school will take you.  As tempting as modern cuisine is, you should have the confidence to tackle any recipe in this book before moving too far forward.  Walk before you run, right?  With the French Laundry in your arsenal, you'll be strutting.  CHECK IT OUT HERE.

Sunday, May 13, 2012

Recipe: Preserved lemons

Preserved lemons add a refreshing international feel to a dish.  They are a good way to add some tartness to a dish without adding so much acidity.  Definitely a staple in Moroccan and Middle Eastern cuisines, but well adaptable for the creative cook.  A little fine diced preserved lemon in your salsa will catch your guests off guard, or you could incorporate them into a cocktail - dry them out, grind them up and rim the glass for a margarita.  Always glass containers or good quality plastic ware for the preparation as the salt is corrosive to metal ones (and cheaper plastic).  A vessel that has a good enough seal to be flipped upside down is a good strategy (tight lidded mason jars are perfect).

I've included a Sufi spice mix for reference, but to be honest I've usually kept the preserving quite simple so the lemons can go in any direction when I use them (often just salt and lemons, maybe a few bay leaves and peppercorns).  If you pack the lemons well, with no air gaps, you won't need any additional lemon juice, but it doesn't hurt as it creates a good seal and adds to the brine.  It is very important that there are no air gaps or lemons exposed above the salt as this is where bacteria can get in and ruin the party.  When you use the lemons, remember to rinse them well of any packing salt as they will have absorbed enough.

You will need:

5                   lemons
1/4 - 1/2C     kosher salt (have lots on hand to be sure)
as needed      lemon juice

Sufi spice (optional):   

1                    cinnamon stick
3                    cloves
6                    coriander
4                    whole black peppercorn
1                    bay leaf

Method:

 - wash the lemons well
 - cut the lemons in quarters and remove the seeds
 - if using spices, toss the lemons and spices and half the salt together in a bowl
 - put a layer of salt down in the bottom of the jar
 - start layering the lemons (and spices) tightly into the jar and fill gaps with more salt
 - once everything is in, give the mix a light press to get some juice flowing
 - add some fresh lemon juice if you like
 - top the jar off with a last layer of salt and press tight
 - set in a dark cupboard for 3 - 4 weeks
 - as juices will naturally settle to the bottom, flip the jar every other day to the topside gets brined evenly
 - once you've started to use the lemons, it is best to keep the jar in the fridge to be safe

Friday, May 11, 2012

Recipe: Banana cake


I made this cake for Carla's birthday recently and served it with the banana rum ice cream - what can I say, in a house full of monkeys, bananas are a hot product.  Its texture is closer to a poundcake than a sponge, and the flavour is great.  I didn't want to chance overflowing the pan during the cook, so I peeled some off and cooked it in a 1/2 pan sized silpat and it on it's own has great potential - thin and even and workable.  I could see it work as a roll cake or divide the batter up into sheets and do a multi layer cake.  I gave it an Oreo base for fun and lightened a cream cheese icing with and Italian meringue using whites I had left over from making the ice cream.  For decoration, I used chopped banana chips and simply made a thick strawberry coulis for writing on top.  Again, if you don't have ripe bananas, slow roasted ones work well.


You will need:

For the base:

150g                  Oreo crumbs
56g                    melted butter


For the cake:

395g                  banana puree
30ml                  lime juice
350g                  cake flour
9g                      baking soda
1.5g                   kosher salt
170g                  unsalted butter, soft
450g                  sugar
3                        large eggs
30ml /2tsp         vanilla paste
350g / 1.5C       buttermilk


For the icing:

250g                 cream cheese
15ml / 1Tbs      sour cream
1/2 tsp              vanilla paste
2                       egg whites
100g                 sugar
100ml               water


Method:

 - set the oven to 325F / 163C
 - melt the butter for the base and mix with the Oreo crumbs
 - spread the Oreo mix around the bottom of a springform pan and press down firmly with an upside down lid or other similar flat surface
 - bake the base for about 8 minutes and let cool
 - drop the oven to 250F / 121C and roast your bananas for 1/2 an hour (if you don't have ripe ones around)
 - bring the oven back up to about 300F / 149C
 - in a standup mixer, cream the butter and sugar til pale
 - add the eggs one at a time, scraping the bowl periodically
 - add the vanilla paste
 - puree the bananas with the lime juice and add in
 - sift the cake flour, baking soda and salt together
 - add in the buttermilk and dry mix alternately, starting with the wet and ending with the dry
 - pour the batter into the pan, if your pan is a shallow one, be careful once you pass the 3/4 mark in case the cake rises too far
 - place the cake on the middle rack of the oven and cook for about an hour, rotating occasionally - it's along time, but it helps the cake rise evenly - check that a skewer comes out clean at the end
 - cool on a rack


For the icing:

 - start cooking the sugar and water towards 250F / 121C (or a good rolling boil)
 - get the whites whipping in the mixer
 - when the whites are at a medium peak and the syrup is hot enough, drizzle the syrup into the meringue
 - let the meringue keep whipping at a medium speed till cool
 - set aside in a bowl covered with plastic wrap
 - with the paddle, start beating the cream cheese
 - scrape the bowl and add the sour cream
 - add the vanilla
 - fold in the Italian meringue
 - transfer the cake to a serving platter (or lazy susan if you have one)
 - apply the icing to the cake and decorate as you wish


Wednesday, May 9, 2012

Recipe: Banana rum ice cream


time for a refill
roasted banana

 This recipe came out amazing.  I started with one of my old work recipes and shrunk it down for home.  I boosted the banana level, incorporated the lime and added a black spiced rum (The Kraken to be exact).  I also used my homemade invert sugar as all the sweetening since we keep our freezer very cold.  The lime comes through beautifully and the rum adds a nice complexity - depending on your taste, there's room for a little more.  I don't keep a supply of black bananas around, so what I usually do when making banana recipes is to roast them in the skins to get a very similar effect.  By pureeing the roasted bananas in the lime juice, the ice cream keeps a nice pale colour instead of oxidized brown. 
scald cream


Cooking the egg and cream mixture to 83C serves two purposes:  it thickens the anglais to make for a creamier product and destroys any potentially harmful pathogens that may be present in the eggs - it's a small risk, but it pays to be safe.  Have the ice bath ready because at that temperature, the eggs want to cook solid, which would give you the "scrambled egg" effect in the anglais.  If this happens and you catch it in time, sometimes a quick strain will remove any solid bits.  A high speed blender can sometimes save the day, but not always - best to use a good thermometer or probe and pay close attention.

temper into yolks


You will need:

250ml /1C                  cream
125ml / 1/2C              milk
2.5ml / 1/2tsp             vanilla paste
3                                 egg yolks
75g / 2.65oz               invert sugar / glucose
250g / 8.8oz               puree of ripe / roasted bananas (2 or 3)
2                                 key limes
cook the anglais to 83C
30ml / 2Tbs                dark spiced rum
pinch                          kosher salt


Method:

 - if you don't have ripe bananas, set the oven to 250F / 121C, set bananas on a pan and roast 1/2 an hour in their skins, turning once or twice over
 -  combine the cream, milk, vanilla,rum,salt and invert sugar and bring to a simmer on the stove
 - lightly whisk the egg yolks, then temper the cream mixture into them
chill quickly
 - prepare an ice bath
 - return the whole mixture to the stove and cook to 83C / 181.4F, scraping the bottom with a spatula continually
 - immediately strain the mixture into a bowl in the ice bath and give a whisk to stop the cooking
 - juice the key limes
 - empty the contents of the roasted bananas and measure out 250g
 - puree the banana pulp with the lime juice till smooth
 - temper the anglais into the banana puree and return to the ice bath
 - press cling film directly onto the surface of the anglais and cool completely
 - move the anglais to the fridge and let it mature overnight
 - set up the ice cream machine and start it turning
 - whisk up the anglais and pour into the machine (if you have a double like I do, use both canisters)
 - churn about 15 minutes
 - scoop into containers and store in the freezer
 - lick the equipment clean
 - return to the freezer and have some more
'ol double barrel

pure deliciousness


fill while running